This guide explains how to set up Redis sentinel failover cluster for caching database or any other data type in high availability node.
Software and hardware requirements
Minimum three VMs running at cloud providers or bare metal servers. Always keep an ODD number of servers.
- Ubuntu 20.04 or Debian 10 Linux LTS.
- Redis server with sentinel on each VM.
- HAProxy for load balancing and traffic redirection to healthy Redis node for writing or reading data.
- Keepalived for IP failover for HAProxys.
- The Redis cluster will be protected using firewall, password, and VLAN or VPC.
- Email-based alert for HAproxy and Keepalived cluster.
- Simple web-based stats for Redis.

My sample setup
Contents
- 1 Software and hardware requirements
- 2 What is Redis Sentinel Cluster?
- 3 Setting up Redis sentinel cluster on Ubuntu or Debian Linux
- 4 Using the redis-cli command
- 5 Configuring the firewall to allow access to our Redis cluster
- 6 Configuring Redis server and sentinel on the redis2 host
- 7 Configuring Redis server and sentinel on the redis3 host
- 8 Redis cluster verification
- 9 Installing HAProxy on both redis1 and redis2 hosts
- 10 Installing Keepalived on both redis1 and redis2 hosts
- 11 Deliverable
- 12 Summing up
What is Redis Sentinel Cluster?
Redis Sentinel provides high availability for Redis. In a three-node cluster, one node is always master (primary) and the other two nodes as the read-only replica. Suppose a master node is not working as expected. In that case, Sentinel can start a failover process where a replica is promoted to master, the other additional replicas are reconfigured to use the new master. The applications using the Redis server are informed about the new address to use when connecting.
Why is HAProxy needed?
We can send specific queries from our HAProxy to determine who is master and replicas. Hence, HAProxy is required so that you don’t have to modify your application.
What role does Keepalived play?
A single HAProxy instance in our cluster also creates a problem when it goes down. Hence, we need to keep the standby HAProxy server ready in case the primary HAProxy goes down. We use Keepalived to monitor the health of HAProxy using VRRP and do IP failover for our Redis cluster. Again, your application is not aware of both HAProxy and IP failover. The whole point of the cluster is to work without any downtime.
Why is VLAN needed?
VLAN is an acronym for Virtual Local Area Network. When VLAN is enabled, you get private and secure communications between your cluster. In addition, by default, traffic is not routed directly to the Internet or other customers in the same LAN. Our Redis sentinel cluster, HAProxy, and Keepalived will talk over VLAN for security and privacy reasons when data is transmitted between these three nodes. We will also add password authentication for our node.
Setting up Redis sentinel cluster on Ubuntu or Debian Linux
First update the /etc/hosts file on all three nodes as follows:
172.0.0.2	redis1 haproxy1 keepalived1
172.0.0.3	redis2 haproxy2 keepalived2
172.0.0.4	redis3
172.0.0.5	vip
Test it with the ping command:
ping -c 2 redis1

ping -c 2 redis2

ping -c 2 redis3

# this should fail as Keepalived not installed

ping -c 2 vip
Installing Redis sentinel cluster on all three nodes
We need to install following two packages on all three nodes:
- redis-server – Main Redis server package
- redis-sentinel – Redis server monitoring and failover package
In other words, type the following apt command all three nodes:
sudo apt update

sudo apt upgrade

sudo apt install redis-server redis-sentinel
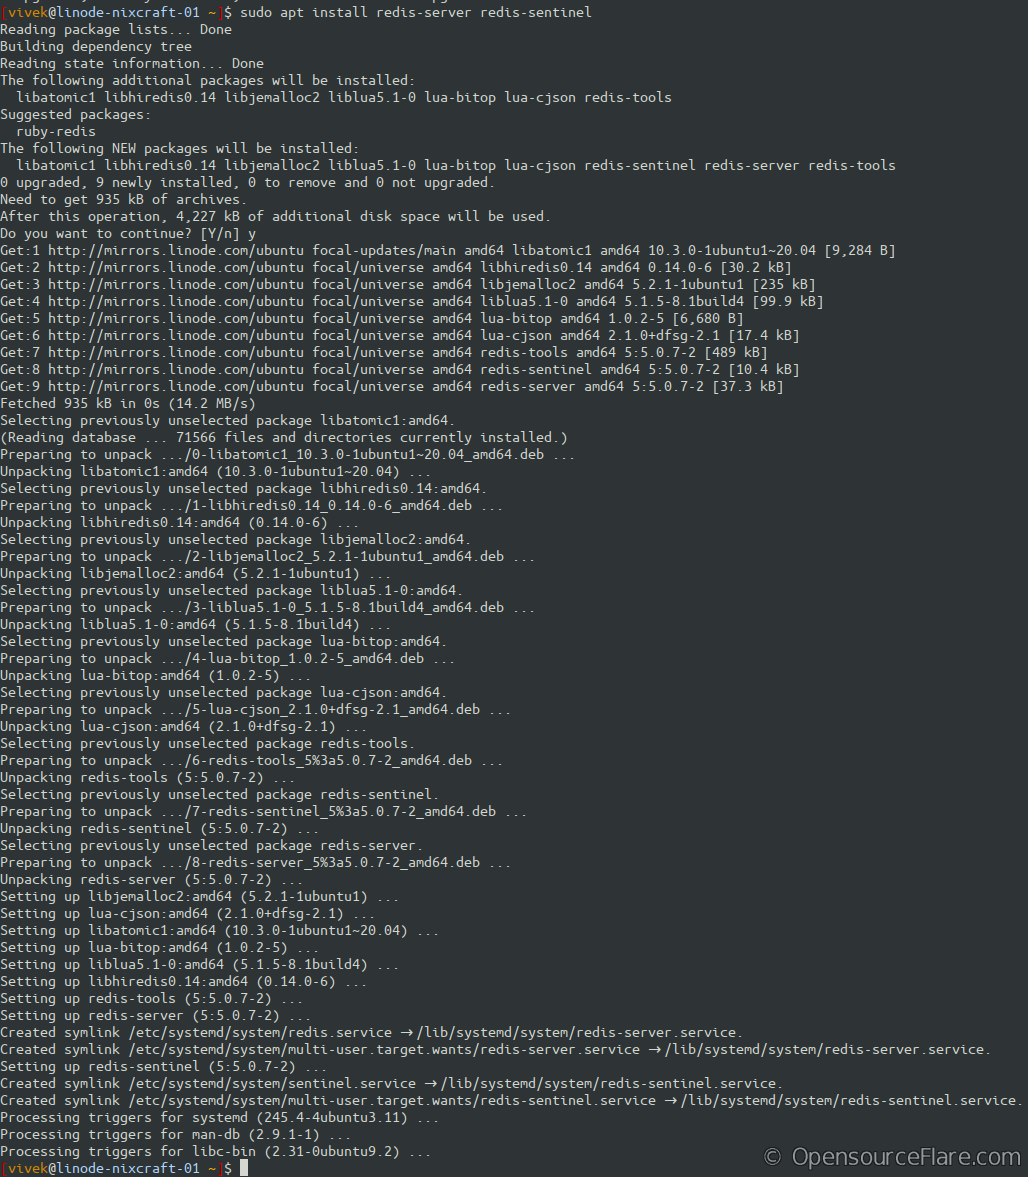
Click to enlarge
Essential files and TCP ports for cluster building
- The /etc/redis/redis.conf file defines Redis standalone server config on each node including replica.
- The /etc/redis/sentinel.conf file defines sentinel monitoring and cluster promotion config on each node.
- The /etc/haproxy/haproxy.cfg file defines HAProxy config for redis1 and redis2 hosts.
- The /etc/keepalived/keepalived.conf file defines IP failover config for HAProxy on redis1 and redis2 hosts.
- The TCP port # 6379 is opened by the Redis standalone server.
- The TCP port # 26379 is opened by the Redis sentinel server responsible for promoting the master Redis server and failover within the Redis cluster.
- The TCP port # 6379 is opened by the HAProxy for VIP that client will use to send read and write Redis requests. Apart from that, HAProxy will also open TCP port 8080 for monitoring Redis cluster status.
- Server log files are at /var/log/redis/redis-sentinel.log and /var/log/redis/redis-server.log location.
Controlling Redis daemon command
Use the systemctl command to control both Redis server and sentinel as follows:
sudo systemctl {status|start|stop|restart} redis-server.service

sudo systemctl {status|start|stop|restart}  redis-sentinel.service
For instance, to stop both services, you would run:
sudo systemctl stop redis-server.service

sudo systemctl stop redis-sentinel.service

sudo systemctl status redis-sentinel.service
Configuring Redis server on the redis1 host
Edit the config file:
sudo vi /etc/redis/redis.conf
Edit as follows:
# Redis IP bind and port
bind 172.0.0.2
port 6379

# Redis memory control
maxmemory 1gb
maxmemory-policy allkeys-lru

# Redis cluster security features
requirepass "dd68a58060db53de71f5e7ecef61_c7f9"
masterauth "dd68a58060db53de71f5e7ecef61_c7f9"
protected-mode yes

# Stop accepting writes if a master detects that it is no longer able to transfer its writes to the specified number of replicas
min-replicas-to-write 1
min-replicas-max-lag 10
Where,
- bind 172.0.0.2 : Redis server must listen to only the VLAN IP address of the redis1 host (e.g. 172.0.0.2). Do not add 127.0.0.1 or any other hosts. It will create conflict—only one IP address.
- port 6379 : Define TCP port for communication between all Redis nodes.
- maxmemory 1gb : The maxmemory configuration directive is used in order to configure Redis to use a specified amount of memory for the data set.
- maxmemory-policy allkeys-lru : The exact behavior Redis follows when the maxmemory limit is reached is configured using the maxmemory-policy configuration directive. Our config tell Redis to evict keys by trying to remove the less recently used (LRU) keys first, in order to make space for the new data added.
- requirepass "dd68a58060db53de71f5e7ecef61_c7f9" : Redis server is password protected.
- masterauth "dd68a58060db53de71f5e7ecef61_c7f9" : Again Redis server is password protected and used for master and replication purposes. So we set the same password for all cluster members. Since our master has a password via requirepass, it’s trivial to configure the replica to use that password in all sync operations. That is why we used the masterauth directive.
- protected-mode yes : This feature bans Redis from talking from the Internet or any other public accessible IP address. In this mode, Redis only replies to queries from the loopback or Bind IP address. Do not disable protected mode under any circumstances as the cluster must only be used internally, and it is not open to everyone over the Internet.
- min-replicas-to-write 1 : Tell a master to stop accepting writes if there are less than one replicas connected.
- min-replicas-max-lag 10 : Set 10 seconds lag time. In other words, require at least one replicas with a lag <= 10 seconds to avoid data loss on a three-node cluster.
Configuring Redis sentinel on the redis1 host
Edit the config file:
sudo vi /etc/redis/sentinel.conf
Edit as follows:
bind 172.0.0.2
port 26379
sentinel deny-scripts-reconfig yes
sentinel monitor mymaster 172.0.0.2 6379 2
sentinel down-after-milliseconds mymaster 3000
sentinel failover-timeout mymaster 6000
sentinel auth-pass mymaster dd68a58060db53de71f5e7ecef61_c7f9
sentinel parallel-syncs mymaster 1
Where,
- bind 172.0.0.2 : By default Sentinel will not be reachable from interfaces different than localhost. Hence, set the VLAN IP address of the redis1 host (e.g. 172.0.0.2). Do not add 127.0.0.1 or any other hosts. It will create conflict—only one IP address.
- port 26379 : Define TCP port for communication between all SENTINEL nodes. Must be different from the Redis server TCP port.
- sentinel deny-scripts-reconfig yes : By default SENTINEL SET will not be able to change the notification-script and client-reconfig-script at runtime. This avoids a trivial security issue where clients can set the script to anything and trigger a failover in order to get the program executed. This is security feature.
- sentinel monitor mymaster 172.0.0.2 6379 2 : The master set is called mymaster. It tells Sentinel to monitor master Redis server host redis1 (IP 172.0.0.2 and TCP port # 6379), and to consider it in objectively down state only if at least 2 quorum sentinels agree. Replicas are auto-discovered, so you don’t need to specify replicas in any way. Sentinel itself will rewrite this configuration file adding the replicas using additional configuration options.
- sentinel down-after-milliseconds mymaster 3000 : Number of milliseconds the master (or any attached replica or sentinel) should be unreachable in order to consider it in DOWN state.
- sentinel failover-timeout mymaster 6000 : Specifies the failover timeout in milliseconds
- sentinel auth-pass mymaster dd68a58060db53de71f5e7ecef61_c7f9 : State the password to use to authenticate with the master and replicas.
- sentinel parallel-syncs mymaster 1 : State how many replicas we can reconfigure to point to the new replica simultaneously during the failover. Use a low number if you use the replicas to serve query to avoid that all the replicas will be unreachable at about the same time while performing the synchronization with the master.
Restarting both Redis server and sentinel on the redis1 host
Use the systemctl command:
sudo systemctl restart redis-server.service

sudo systemctl restart redis-sentinel.service
Verification and debugging tips
If you are doing this the first time or are new to clustering, the chances are high that your Redis server or sentinel may not start due to confusion. Fear not. We can verify and fix errors immediately before moving to redis2 and redis3 hosts. Is your Redis server and sentinel started without any errors? Run:
sudo systemctl status redis-server.service

sudo systemctl status redis-sentinel.service
You must see green single indicating that both services restarted without any errors:
● redis-sentinel.service - Advanced key-value store
     Loaded: loaded (/lib/systemd/system/redis-sentinel.service; enabled; vendor preset: enabled)
     Active: active (running) since Thu 2021-07-29 06:07:54 UTC; 8min ago
       Docs: http://redis.io/documentation,
             man:redis-sentinel(1)
    Process: 4442 ExecStart=/usr/bin/redis-sentinel /etc/redis/sentinel.conf (code=exited, status=0/SUCCESS)
   Main PID: 4456 (redis-sentinel)
      Tasks: 4 (limit: 4617)
     Memory: 1.9M
     CGroup: /system.slice/redis-sentinel.service
             └─4456 /usr/bin/redis-sentinel 172.0.0.2:26379 [sentinel]

Jul 29 06:07:54 linode-nixcraft-01 systemd[1]: Starting Advanced key-value store...
Jul 29 06:07:54 linode-nixcraft-01 systemd[1]: Started Advanced key-value store.
If not running, try to see status as follows and read server error log using the journalctl command or tail command/more command as follows:
sudo journalctl -u redis-server
sudo journalctl -u redis-sentinel

# See log files #
sudo tail -f /var/log/redis/redis-sentinel.log
sudo tail -f /var/log/redis/redis-server.log
Are TCP ports open? Enter the following ss command and grep command/egrep command to filter out results for Redis servers:
sudo ss -tulpn | grep -i redis
The successful output indicating that TCP ports opened by both Redis server and sentinel as follows:
tcp     LISTEN   0        511            172.0.0.2:6379           0.0.0.0:*      users:(("redis-server",pid=4516,fd=6))
tcp     LISTEN   0        511            172.0.0.2:26379          0.0.0.0:*      users:(("redis-sentinel",pid=4456,fd=6))
If you still can’t figure out what went wrong, I recommend that stopping all Redis services and then running them directly at the console as follows to spit out errors directly on the screen:
# 1. Kill both servers
sudo killall -9 redis-server
sudo killall -9 redis-sentinel

# 2. Run it manually
sudo redis-server /etc/redis/redis.conf
sudo redis-sentinel /etc/redis/sentinel.conf

# 3. See errors and fix the config file. For example:
sudo vim /etc/redis/sentinel.conf

# 4. Then kill both processes again as you fixed the config
sudo killall -9 redis-server
sudo killall -9 redis-sentinel

# 5. Start normally
sudo systemctl start redis-server.service
sudo systemctl start redis-sentinel.service

# 6. Verify it and make sure both services are running in a green state
sudo ps aux | grep '^redis'
sudo ss -tulpn | grep -i redis
sudo systemctl status redis-server.service
sudo systemctl status redis-sentinel.service
Using the redis-cli command
The redis-cli is command-line client to redis-server. The syntax is:
redis-cli command
redis-cli -h HOST_NAME -a 'auth_password' -p port_number command

# Can we connect to the server?
redis-cli -h redis1 -a 'dd68a58060db53de71f5e7ecef61_c7f9' -p 6379 ping

# Get Redis cluster info
redis-cli -h redis1 -a 'dd68a58060db53de71f5e7ecef61_c7f9' -p 6379 info replication

# Add a new key and display it:

# Password can be set as follows too:
export REDISCLI_AUTH='dd68a58060db53de71f5e7ecef61_c7f9'
redis-cli -h redis1 -p 6379 ping
redis-cli -h redis1 -p 6379 info replication
Getting info about Redis sentinel
The syntax is
export REDISCLI_AUTH='dd68a58060db53de71f5e7ecef61_c7f9'
redis-cli -h redis1 -p 26379 info
redis-cli -h redis1 -p 26379 sentinel master mymaster

# Can we write read and write data to Redis server?
redis-cli -h redis1 -p 6379 set key 'value'
redis-cli -h redis1 -p 6379 get key
redis-cli -h redis1 -p 6379 del key

# For example, the following should fail as we configured our cluster only to write
# there is at least one replica available and we haven't set replica yet on the
# redis2 or redis3
redis-cli -h redis1 -p 6379 set myos 'Linux'
redis-cli -h redis1 -p 6379 get myos
redis-cli -h redis1 -p 6379 del myos
So let us configure replication on the redis2 and redis3 host.
Configuring the firewall to allow access to our Redis cluster
The TCP port # 26379 and # 6379 are opened by our Redis cluster. So we need to configure ufw to allow access for each host on VLAN from VLAN CIDR. You need to type the following commands by adjusting the shell variable. The next step will increase your cluster security by firewalling port. First gain access to root account using the sudo command and then type.
Without correct firewall rules, communication between the Redis cluster will never take place. If you are new to ufw, see my guide from nixCraft about ufw on Ubuntu Linux 20.04 LTS.
redis1 host firewall
VLAN_CIDR="172.0.0.0/24"
VLAN_IF="eth1"
VLAN_REDIS_IP="172.0.0.2"
VLAN_REDIS_DESC="redis1"
VLAN_REDIS_PORT="6379"
VLAN_SENTIEL_PORT="26379"
ufw allow in on "${VLAN_IF}" from "${VLAN_CIDR}" to "${VLAN_REDIS_IP}" port "${VLAN_REDIS_PORT}" proto tcp comment "Open TCP Redis PORT on ${VLAN_REDIS_DESC} host for cluster"
ufw allow in on "${VLAN_IF}" from "${VLAN_CIDR}" to "${VLAN_REDIS_IP}" port "${VLAN_SENTIEL_PORT}" proto tcp comment "Open TCP SENTIEL PORT on ${VLAN_REDIS_DESC} host for cluster"
redis2 host firewall
VLAN_CIDR="172.0.0.0/24"
VLAN_IF="eth1"
VLAN_REDIS_IP="172.0.0.3"
VLAN_REDIS_DESC="redis2"
VLAN_REDIS_PORT="6379"
VLAN_SENTIEL_PORT="26379"
ufw allow in on "${VLAN_IF}" from "${VLAN_CIDR}" to "${VLAN_REDIS_IP}" port "${VLAN_REDIS_PORT}" proto tcp comment "Open TCP Redis PORT on ${VLAN_REDIS_DESC} host for cluster"
ufw allow in on "${VLAN_IF}" from "${VLAN_CIDR}" to "${VLAN_REDIS_IP}" port "${VLAN_SENTIEL_PORT}" proto tcp comment "Open TCP SENTIEL PORT on ${VLAN_REDIS_DESC} host for cluster"
redis3 host firewall
VLAN_CIDR="172.0.0.0/24"
VLAN_IF="eth1"
VLAN_REDIS_IP="172.0.0.4"
VLAN_REDIS_DESC="redis3"
VLAN_REDIS_PORT="6379"
VLAN_SENTIEL_PORT="26379"
ufw allow in on "${VLAN_IF}" from "${VLAN_CIDR}" to "${VLAN_REDIS_IP}" port "${VLAN_REDIS_PORT}" proto tcp comment "Open TCP Redis PORT on ${VLAN_REDIS_DESC} host for cluster"
ufw allow in on "${VLAN_IF}" from "${VLAN_CIDR}" to "${VLAN_REDIS_IP}" port "${VLAN_SENTIEL_PORT}" proto tcp comment "Open TCP SENTIEL PORT on ${VLAN_REDIS_DESC} host for cluster"
Setting up Linux kernel variables for Redis+HAProxy+Keepalived
The Linux kernel variable net.ipv4.ip_nonlocal_bind allows Linux processes to bind to IP address that doesn’t exist yet. Without this, many server processes, including HAProxy, IP failover, and LB, may not work at boot time or state changes. See Linux bind IP that doesn’t exist with net.ipv4.ip_nonlocal_bind for more info. Think of it as the secret sauce for your cluster to work.
sudo vim /etc/sysctl.d/1000-custom.confAppend the following line:
## Allow HAProxy to start and bind to non local IP on boot and IP failover ##
net.ipv4.ip_nonlocal_bind=1
Save and close the file. Reload changes using the sysctl command:
sudo sysctl -p /etc/sysctl.d/1000-custom.conf
Outputs:
net.ipv4.ip_nonlocal_bind = 1
Configuring Redis server and sentinel on the redis2 host
Run on the redis2 host:
sudo vi /etc/redis/redis.conf
Edit as follows:
# Redis servers IP address and port
# Do not use 127.0.0.1 and other IPs
bind 172.0.0.3
port 6379
protected-mode yes

# Auth settings for Primary/Master Redis must be same on all cluster nodes
requirepass "dd68a58060db53de71f5e7ecef61_c7f9"
masterauth "dd68a58060db53de71f5e7ecef61_c7f9"

# Point to the IP:PORT of primary/master Redis server
replicaof 172.0.0.2 6379

# Redis memory control for this Redis server
maxmemory 1gb
maxmemory-policy allkeys-lru

# Stop accepting writes if a master detects that it is no longer able to transfer its writes to the specified number of replicas
min-replicas-to-write 1
min-replicas-max-lag 10
Again, run on the redis2 host:
sudo vi /etc/redis/sentinel.conf
Duplicate directive names in the Redis sentinel config file always create problems. First, make sure only one directive exists.
Edit as follows:
# This sentinel server IP:Port
bind 172.0.0.3
port 26379
sentinel deny-scripts-reconfig yes

# Point to master Redis server IP port
sentinel monitor mymaster 172.0.0.2 6379 2

# Password for master Redis
sentinel auth-pass mymaster dd68a58060db53de71f5e7ecef61_c7f9

sentinel down-after-milliseconds mymaster 3000
sentinel failover-timeout mymaster 6000
sentinel parallel-syncs mymaster 1
Restart or start the services on the redis2 using the systemctl command:
sudo systemctl restart redis-server.service

sudo systemctl restart redis-sentinel.service
Verify both services (see verification and debugging tips section if error(s) reported)
sudo systemctl status redis-{server,sentinel}.service
Configuring Redis server and sentinel on the redis3 host
Run on the redis3 host:
sudo vi /etc/redis/redis.conf
Edit as follows:
# Redis servers IP address and port
# Do not use 127.0.0.1 and other IPs
bind 172.0.0.4
port 6379
protected-mode yes

# Auth settings for Primary/Master Redis must be same on all cluster nodes
requirepass "dd68a58060db53de71f5e7ecef61_c7f9"
masterauth "dd68a58060db53de71f5e7ecef61_c7f9"

# Point to the IP:PORT of primary/master Redis server
replicaof 172.0.0.2 6379

# Redis memory control for this Redis server
maxmemory 1gb
maxmemory-policy allkeys-lru

# Stop accepting writes if a master detects that it is no longer able to transfer its writes to the specified number of replicas
min-replicas-to-write 1
min-replicas-max-lag 10
Again, run on the redis3 host:
sudo vi /etc/redis/sentinel.conf
Edit as follows:
# This sentinel server IP:Port
bind 172.0.0.4
port 26379
sentinel deny-scripts-reconfig yes

# Point to master Redis server IP port
sentinel monitor mymaster 172.0.0.2 6379 2

# Password for master Redis
sentinel auth-pass mymaster dd68a58060db53de71f5e7ecef61_c7f9

sentinel down-after-milliseconds mymaster 3000
sentinel failover-timeout mymaster 6000
sentinel parallel-syncs mymaster 1
Restart or start the services on the redis3 using the systemctl command:
sudo systemctl restart redis-server.service

sudo systemctl restart redis-sentinel.service
Verify both services (see verification and debugging tips section if error(s) reported)
sudo systemctl status redis-{server,sentinel}.service
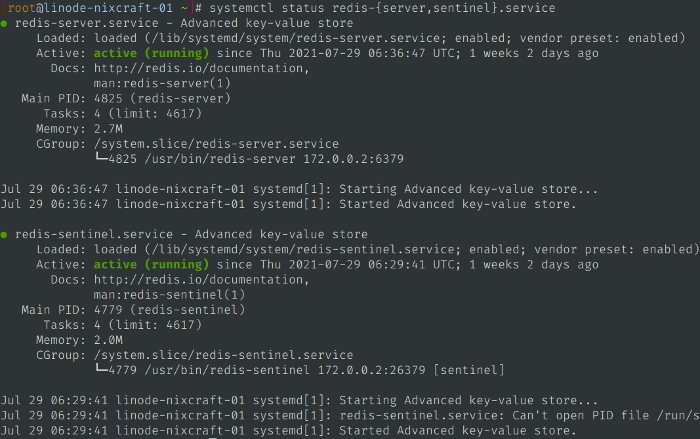
Both Redis server and Sentinel cluster running on my host
Redis cluster verification
At this stage, our Redis cluster is up and running. We can verify it simply by running commands.
Are all cluster nodes reachable?
First, set Redis authentication shell variables and then run:
export REDISCLI_AUTH='dd68a58060db53de71f5e7ecef61_c7f9'

redis-cli -h redis1 -p 6379 ping

redis-cli -h redis2 -p 6379 ping

redis-cli -h redis3 -p 6379 ping
Displaying Redis cluster master and slave status
export REDISCLI_AUTH='dd68a58060db53de71f5e7ecef61_c7f9'

redis-cli -h redis1 -p 6379 info replication

# you can query any node in the cluser from any host

redis-cli -h redis2 -p 6379 info replication

redis-cli -h redis3 -p 6379 info replication
The following outputs confirms working Redis cluster. Hence, from the redis1 host, we can see this box is master (role:master) with 2 nodes connected as slave (connected_slaves:2) and you can see IP address such as
slave0:ip=172.0.0.3,port=6379,state=online,offset=594130,lag=0:
# Replication
role:master
connected_slaves:2
min_slaves_good_slaves:2
slave0:ip=172.0.0.3,port=6379,state=online,offset=594130,lag=0
slave1:ip=172.0.0.4,port=6379,state=online,offset=593864,lag=0
master_replid:46297bc6d068262aeb79c1d1a490654219a700ff
master_replid2:0000000000000000000000000000000000000000
master_repl_offset:594130
second_repl_offset:-1
repl_backlog_active:1
repl_backlog_size:1048576
repl_backlog_first_byte_offset:1
repl_backlog_histlen:594130
Displaying Sentinel cluster monitor status
export REDISCLI_AUTH='dd68a58060db53de71f5e7ecef61_c7f9'

redis-cli -h redis1 -p 26379 info

redis-cli -h redis1 -p 26379 sentinel master mymaster

# again you can query any any node in the cluster from any host

redis-cli -h redis2 -p 26379 info

redis-cli -h redis2 -p 26379 sentinel master mymaster

redis-cli -h redis3 -p 26379 info

redis-cli -h redis3 -p 26379 sentinel master mymaster
Again from the redis1 host, we can see sentinel is working and pointing to the correct master node in the cluster. Look for num-slaves and quorum too. This confirms sentinel is working as expected:
 1) "name"
 2) "mymaster"
 3) "ip"
 4) "172.0.0.2"
 5) "port"
 6) "6379"
 7) "runid"
 8) "70462c8a765f1c1ab6beb1621094a50c31cc2989"
 9) "flags"
10) "master"
11) "link-pending-commands"
12) "0"
13) "link-refcount"
14) "1"
15) "last-ping-sent"
16) "0"
17) "last-ok-ping-reply"
18) "147"
19) "last-ping-reply"
20) "147"
21) "down-after-milliseconds"
22) "3000"
23) "info-refresh"
24) "9529"
25) "role-reported"
26) "master"
27) "role-reported-time"
28) "795493918"
29) "config-epoch"
30) "0"
31) "num-slaves"
32) "2"
33) "num-other-sentinels"
34) "2"
35) "quorum"
36) "2"
37) "failover-timeout"
38) "6000"
39) "parallel-syncs"
40) "1"
Testing failover and master status
The whole point of having a cluster is to have the correct master node to write data and read from the rest of the nodes. So let us reboot the redis1 host or shutdown services on the redis1 to simulate failures:
sudo shutdown -r now

# or #

sudo systemctl stop redis-{server,sentinel}.service
Can we connect to the redis1 now?
redis-cli -h redis1 -p 6379 ping
Could not connect to Redis at redis1:6379: Connection refused
So who is master now? Query two running nodes:
redis-cli -h redis2 -p 6379 info replication

redis-cli -h redis3 -p 6379 info replication
One of them should be the master node as promoted by Sentinel cluster monitor (outputs from the redis2 host):
# Replication
role:master
connected_slaves:1
min_slaves_good_slaves:1
slave0:ip=172.0.0.4,port=6379,state=online,offset=728413,lag=0
master_replid:2da551bee793a24ac4873d12c27a5a1fd135aeb1
master_replid2:46297bc6d068262aeb79c1d1a490654219a700ff
master_repl_offset:728413
second_repl_offset:715483
repl_backlog_active:1
repl_backlog_size:1048576
repl_backlog_first_byte_offset:168160
repl_backlog_histlen:560254
Verify it with sentinel:
redis-cli -h redis3 -p 26379 sentinel master mymaster

redis-cli -h redis2 -p 26379 sentinel master mymaster
Sample outputs:
 1) "name"
 2) "mymaster"
 3) "ip"
 4) "172.0.0.3"
 5) "port"
 6) "6379"
 7) "runid"
 8) "06c81a28e14090f88c9bccc4619e4208847fc930"
 9) "flags"
10) "master"
11) "link-pending-commands"
12) "0"
13) "link-refcount"
14) "1"
15) "last-ping-sent"
16) "0"
17) "last-ok-ping-reply"
18) "836"
19) "last-ping-reply"
20) "836"
21) "down-after-milliseconds"
22) "3000"
23) "info-refresh"
24) "7326"
25) "role-reported"
26) "master"
27) "role-reported-time"
28) "228793"
29) "config-epoch"
30) "1"
31) "num-slaves"
32) "2"
33) "num-other-sentinels"
34) "2"
35) "quorum"
36) "2"
37) "failover-timeout"
38) "6000"
39) "parallel-syncs"
40) "1"
We can only write data to redis2 and read it from either redis2 or redis3 while redis1 is down:
redis-cli -h redis2 -p 6379 set mydeskos 'macOS'

redis-cli -h redis3 -p 6379 get mydeskos
So what happens when the redis1 comes online? The redis1 will join as a read-only slave, and redis2 will continue to act as master.
Installing HAProxy on both redis1 and redis2 hosts
The above setup works well if your code written in PHP/Python/Ruby can query the correct master node and slave nodes using info replication command. Then it is just a matter of sending a query to the correct master and slave/read-only replica nodes. However, we can make this whole thing transparent using HAProxy. That way, HAProxy will route write and read queries automatically to healthy master mode. In other words, you don’t have to modify your application, and we will let HAProxy do dirty work for us.
Installation
Type the following command on both redis1 and redis2 nodes:
sudo apt install haproxy
Sample session:
Reading package lists... Done
Building dependency tree
Reading state information... Done
The following additional packages will be installed:
  liblua5.3-0
Suggested packages:
  vim-haproxy haproxy-doc
The following NEW packages will be installed:
  haproxy liblua5.3-0
0 upgraded, 2 newly installed, 0 to remove and 0 not upgraded.
Need to get 1,635 kB of archives.
After this operation, 3,777 kB of additional disk space will be used.
Do you want to continue? [Y/n] y
Get:1 http://mirrors.linode.com/ubuntu focal/main amd64 liblua5.3-0 amd64 5.3.3-1.1ubuntu2 [116 kB]
Get:2 http://mirrors.linode.com/ubuntu focal-updates/main amd64 haproxy amd64 2.0.13-2ubuntu0.1 [1,519 kB]
Fetched 1,635 kB in 0s (18.5 MB/s)
Selecting previously unselected package liblua5.3-0:amd64.
(Reading database ... 71644 files and directories currently installed.)
Preparing to unpack .../liblua5.3-0_5.3.3-1.1ubuntu2_amd64.deb ...
Unpacking liblua5.3-0:amd64 (5.3.3-1.1ubuntu2) ...
Selecting previously unselected package haproxy.
Preparing to unpack .../haproxy_2.0.13-2ubuntu0.1_amd64.deb ...
Unpacking haproxy (2.0.13-2ubuntu0.1) ...
Setting up liblua5.3-0:amd64 (5.3.3-1.1ubuntu2) ...
Setting up haproxy (2.0.13-2ubuntu0.1) ...
Created symlink /etc/systemd/system/multi-user.target.wants/haproxy.service → /lib/systemd/system/haproxy.service.
Processing triggers for man-db (2.9.1-1) ...
Processing triggers for libc-bin (2.31-0ubuntu9.2) ...
Processing triggers for rsyslog (8.2001.0-1ubuntu1.1) ...
Processing triggers for systemd (245.4-4ubuntu3.11) ...
Configuration
HAProxy is a load balancer and traffic redirector for our Redis cluster using VIP (virtual IP address 172.0.0.5). Let us edit the /etc/haproxy/haproxy.cfg both redis1 and redis2 node, run:
$ sudo mv -v /etc/haproxy/haproxy.cfg{,.factory}

renamed '/etc/haproxy/haproxy.cfg' -> '/etc/haproxy/haproxy.cfg.factory

$ sudo vim /etc/haproxy/haproxy.cfg
Update as follows (I commented config for ease of reading of options):
# Global setting for high performance HAProxy
# Set up user, group and number of connection for HAProxy
global
   daemon
   maxconn 65536
   log /dev/log    local0
   log /dev/log    local1 notice
   chroot /var/lib/haproxy
   stats socket /run/haproxy/admin.sock mode 660 level admin expose-fd listeners
   stats timeout 30s
   user haproxy
   group haproxy

#
# Get an email alert (START_HERE)
# Send an email when Redis node goes up and down etc
# Must have a working smtpd such as Postfix on your VLAN
# I have Postfix running on both redis1 and redis2 at localhost
# Skip smtp_servers section if you do not need email notification
#
mailers smtp_servers
   mailer smtp1 127.0.0.1:25

defaults
   mode tcp
   timeout connect 5000ms
   timeout client 50000ms
   timeout server 50000ms

   # email settings 'from' and 'to' email IDs for your domain
   email-alert mailers smtp_servers
   email-alert from [email protected]
   email-alert to [email protected]
   email-alert level info
#
# Get an email alert (END_HERE)

#
# Define frontent to see status of Redis cluster using web panel at
# redis1:8080 or redis2:8080 over ssh bases session
#
frontend http
        bind 127.0.0.1:8080
        default_backend stats

# Set up admin UI and refresh it every 10 seconds
backend stats
        mode http
        stats enable

        stats enable
        stats uri /
        stats refresh 10s
        stats show-legends
        stats admin if TRUE

#
# Redis config
# All magic happens below for traffic redirection
#
defaults REDIS
        mode tcp
        timeout connect 3s
        timeout server 6s
        timeout client 6s
        option  log-health-checks

# Define VIP of the redis and port here
# All clients and PHP/Python/Perl/Ruby app will always send
# requests at 172.0.0.5:6379 (VIP)
# ---------------------------------------------------------
# This VIP will be set by Keepalived in next part of config
# VIP provides IP failover and HA option for HAProxy and
# thus to our Redis cluster using VIP
# ---------------------------------------------------------
frontend front_redis
        bind 172.0.0.5:6379 name redis
        mode tcp
        default_backend redis_cluster

# Now set redis auth for our cluster and run queries to find out
# who is master in the cluster and send ping request to add or remove
# servers on fly
# --------------------------------------------------------------------
# define IP address and tcp ports of all three redis nodes below
# redis1 - 172.0.0.2
# redis2 - 172.0.0.3
# redis3 - 172.0.0.4
# --------------------------------------------------------------------
backend redis_cluster
	mode tcp
        option tcp-check
        tcp-check connect
        tcp-check send AUTH\ dd68a58060db53de71f5e7ecef61_c7f9\r\n
        tcp-check send PING\r\n
        tcp-check expect string +PONG
        tcp-check send info\ replication\r\n
        tcp-check expect string role:master
        tcp-check send QUIT\r\n
        tcp-check expect string +OK

        server redis1 172.0.0.2:6379 check inter 3s
        server redis2 172.0.0.3:6379 check inter 3s
        server redis3 172.0.0.4:6379 check inter 3s

# redis block end
Save and close the file. Make sure correct permissions are set on config file using the chmod command:
sudo chmod -v 0640 /etc/haproxy/haproxy.cfg

mode of '/etc/haproxy/haproxy.cfg' changed from 0644 (rw-r--r--) to 0640 (rw-r-----)

ls -l /etc/haproxy/haproxy.cfg

# can normal user see our config? #

cat /etc/haproxy/haproxy.cfg
Controlling HAproxy daemon command
We need to use the systemctl command as follows:
sudo systemctl start haproxy.service

sudo systemctl stop haproxy.service

sudo systemctl restart haproxy.service

sudo systemctl status haproxy.service
Go ahead add 172.0.0.5/24 as VIP using the ip command for eth1 interface for testing purposes (we will automate VIP addition in the next step using the Keepalived IP failover service) and then restart the haproxy service on both redis1 and redis2 hosts:
sudo ip addr add 172.0.0.5/24 dev eth1

sudo systemctl restart haproxy.service

sudo systemctl status haproxy.service
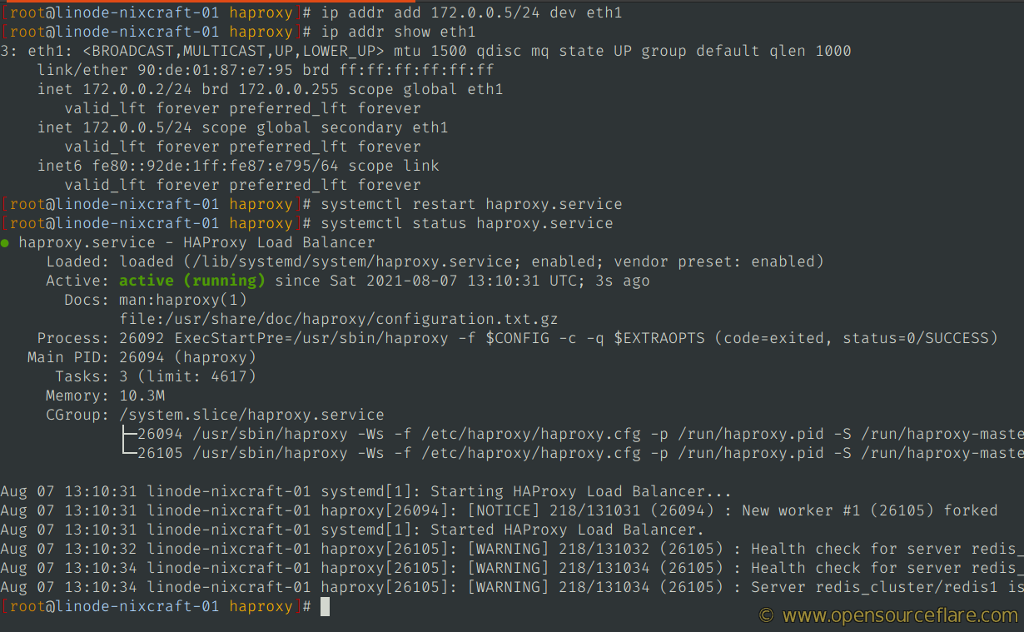
HAProxy working on both redis1 and redis2 host
Setting up firewall rules for HAProxy/Keepalived controlled VIP 172.0.0.5:6379
Type the following command on both redis1 and redis2 host to open 6379 for for VLAN_CIDR 172.0.0.0/24:
sudo -i # become root and then set up rules
VLAN_IF="eth1"
VLAN_CIDR="172.0.0.0/24"
HAPROXY_VIP="172.0.0.5"
HAPROXY_PORT="6379"
ufw allow in on "$VLAN_IF" from "$VLAN_CIDR" to "$HAPROXY_VIP" port "$HAPROXY_PORT" proto tcp \
comment 'VLAN_CIDR->HAPROXY->VIP->Redis cluster'
Installing Keepalived on both redis1 and redis2 hosts
Keepalived is a routing and IP failover software, and we can get high availability for HAProxy by VRRP protocol. However, VRRP is an actual brick for IP failover. If you reboot the redis1 host, the client won’t reach our VIP 172.0.0.5:6379, and there will be no high availability. Hence, we need to redirect traffic to standby HAProxy running on the redis2 host.
Installation
Type the apt command on both redis1 and redis2 hosts:
sudo apt install keepalived
Outputs:
Reading package lists... Done
Building dependency tree
Reading state information... Done
The following additional packages will be installed:
  ipvsadm libmysqlclient21 libsnmp-base libsnmp35 mysql-common
Suggested packages:
  heartbeat ldirectord snmp-mibs-downloader
The following NEW packages will be installed:
  ipvsadm keepalived libmysqlclient21 libsnmp-base libsnmp35 mysql-common
0 upgraded, 6 newly installed, 0 to remove and 0 not upgraded.
Need to get 2,820 kB of archives.
After this operation, 13.2 MB of additional disk space will be used.
Do you want to continue? [Y/n] y
Get:1 http://mirrors.linode.com/ubuntu focal/main amd64 mysql-common all 5.8+1.0.5ubuntu2 [7,496 B]
Get:2 http://mirrors.linode.com/ubuntu focal-updates/main amd64 libmysqlclient21 amd64 8.0.26-0ubuntu0.20.04.2 [1,228 kB]
Get:3 http://mirrors.linode.com/ubuntu focal-updates/main amd64 libsnmp-base all 5.8+dfsg-2ubuntu2.3 [206 kB]
Get:4 http://mirrors.linode.com/ubuntu focal-updates/main amd64 libsnmp35 amd64 5.8+dfsg-2ubuntu2.3 [978 kB]
Get:5 http://mirrors.linode.com/ubuntu focal/main amd64 keepalived amd64 1:2.0.19-2 [360 kB]
Get:6 http://mirrors.linode.com/ubuntu focal/main amd64 ipvsadm amd64 1:1.31-1 [40.2 kB]
Fetched 2,820 kB in 0s (28.7 MB/s)
Selecting previously unselected package mysql-common.
(Reading database ... 71813 files and directories currently installed.)
Preparing to unpack .../0-mysql-common_5.8+1.0.5ubuntu2_all.deb ...
Unpacking mysql-common (5.8+1.0.5ubuntu2) ...
Selecting previously unselected package libmysqlclient21:amd64.
Preparing to unpack .../1-libmysqlclient21_8.0.26-0ubuntu0.20.04.2_amd64.deb ...
Unpacking libmysqlclient21:amd64 (8.0.26-0ubuntu0.20.04.2) ...
Selecting previously unselected package libsnmp-base.
Preparing to unpack .../2-libsnmp-base_5.8+dfsg-2ubuntu2.3_all.deb ...
Unpacking libsnmp-base (5.8+dfsg-2ubuntu2.3) ...
Selecting previously unselected package libsnmp35:amd64.
Preparing to unpack .../3-libsnmp35_5.8+dfsg-2ubuntu2.3_amd64.deb ...
Unpacking libsnmp35:amd64 (5.8+dfsg-2ubuntu2.3) ...
Selecting previously unselected package keepalived.
Preparing to unpack .../4-keepalived_1%3a2.0.19-2_amd64.deb ...
Unpacking keepalived (1:2.0.19-2) ...
Selecting previously unselected package ipvsadm.
Preparing to unpack .../5-ipvsadm_1%3a1.31-1_amd64.deb ...
Unpacking ipvsadm (1:1.31-1) ...
Setting up ipvsadm (1:1.31-1) ...
Setting up mysql-common (5.8+1.0.5ubuntu2) ...
update-alternatives: using /etc/mysql/my.cnf.fallback to provide /etc/mysql/my.cnf (my.cnf) in auto mode
Setting up libmysqlclient21:amd64 (8.0.26-0ubuntu0.20.04.2) ...
Setting up libsnmp-base (5.8+dfsg-2ubuntu2.3) ...
Setting up libsnmp35:amd64 (5.8+dfsg-2ubuntu2.3) ...
Setting up keepalived (1:2.0.19-2) ...
Created symlink /etc/systemd/system/multi-user.target.wants/keepalived.service → /lib/systemd/system/keepalived.service.
Processing triggers for systemd (245.4-4ubuntu3.11) ...
Processing triggers for man-db (2.9.1-1) ...
Processing triggers for dbus (1.12.16-2ubuntu2.1) ...
Processing triggers for libc-bin (2.31-0ubuntu9.2) ...
Configuration
Edit the /etc/keepalived/keepalived.conf file on the redis1 host:
sudo vim /etc/keepalived/keepalived.conf
Append the config as follows:
# Global Settings for email notifications
# Setup to and from email for 127.0.0.1 smptd
# router_ID must be uniq for redis1
global_defs {
    notification_email {
        [email protected]
    }
    notification_email_from [email protected]
    smtp_server 127.0.0.1
    smtp_connect_timeout 15
    router_id LB1_DB1_REDIS_1
}

# Define the script used to check if haproxy is still working
vrrp_script chk_haproxy {
    script "/usr/bin/killall -0 haproxy"
    interval 2
    weight 2
}

# Configuration for Virtual Interface
# For primary/master redis1 VIP set state to MASTER and
# virtual_router_id to 51
# For master always set priority higher (say 101 on the redis1 host)
# For backup it would be 100 on the redis2 host.
# ---------------------------------------------------------------------
vrrp_instance LB_VIP_1 {
    interface eth1
    state MASTER
    priority 101
    virtual_router_id 51

    smtp_alert

    authentication {
        auth_type AH
        auth_pass 6051b639563f4fc9f229b4db88b6af74  # Password for accessing vrrpd. Same on all devices
    }
    unicast_src_ip  172.0.0.2 # Private IP address of master (redis1)
    unicast_peer {
        172.0.0.3			  # Private IP address of the backup haproxy (redis2)
    }

    # The virtual ip (VIP) address shared between the two HAProxy/LBs
    virtual_ipaddress {
        172.0.0.5/24
    }

    # Use the Defined Script to Check whether to initiate a fail over
    track_script {
        chk_haproxy
    }
}
Save and close the file. Next, edit the /etc/keepalived/keepalived.conf file on the redis2 host as follows:
# Global Settings for email notifications
# Setup to and from email for 127.0.0.1 smptd
# router_ID must be uniq for redis2
global_defs {
    notification_email {
        [email protected]
    }
    notification_email_from [email protected]
    smtp_server 127.0.0.1
    smtp_connect_timeout 15
    router_id LB2_DB2_REDIS_2
}

# Define the script used to check if haproxy is still working
vrrp_script chk_haproxy {
    script "/usr/bin/killall -0 haproxy"
    interval 2
    weight 2
}

# Configuration for Virtual Interface
# For primary/master redis1 VIP set state to BACKUP  and
# virtual_router_id to 51
# You must set priority lower on BACKUP (say 100 on the redis2 host)
# -------------------------------------------------------------------
vrrp_instance LB_VIP_1 {
    interface eth1
    state BACKUP
    priority 100
    virtual_router_id 51

    smtp_alert

    authentication {
        auth_type AH
        auth_pass 6051b639563f4fc9f229b4db88b6af74  # Password for accessing vrrpd. Same on all devices
    }
    unicast_src_ip  172.0.0.3 # Private IP address of slave (redis2)
    unicast_peer {
        172.0.0.2			  # Private IP address of the backup haproxy (redis1)
    }

    # The virtual ip (VIP) address shared between the two HAProxy/LBs
    virtual_ipaddress {
        172.0.0.5/24
    }

    # Use the Defined Script to Check whether to initiate a fail over
    track_script {
        chk_haproxy
    }
}
Close and save the file. Then, make sure you set up the correct permission using the chmod command:
sudo chmod -v 0640 /etc/keepalived/keepalived.conf
Outputs:
mode of '/etc/keepalived/keepalived.conf' changed from 0644 (rw-r--r--) to 0640 (rw-r-----)
Firewall config for the Keepalived VRRP traffic
Type on the redis1 host:
# first become root user
sudo -i

# Then open allow VRRP traffic between the redis1 and redis2 keepalived for
# IP failover when HAProxy is down
VLAN_IF="eth1"
VLAN_SRC="172.0.0.3" # <--- redis2 IP here
VLAN_DEST="224.0.0.18"
VLAN_FW_COMMENTS="VLAN: keepalived multicast"
ufw allow in on "${VLAN_IF}" from "${VLAN_SRC}" to "${VLAN_DEST}" proto ah \
comment "${VLAN_FW_COMMENTS}"
Type on the redis2 host:
# first become root user
sudo -i

# Then open allow VRRP traffic between the redis1 and redis2 keepalived for
# IP failover when HAProxy is down
VLAN_IF="eth1"
VLAN_SRC="172.0.0.2" # <--- redis1 IP here
VLAN_DEST="224.0.0.18"
VLAN_FW_COMMENTS="VLAN: keepalived multicast"
ufw allow in on "${VLAN_IF}" from "${VLAN_SRC}" to "${VLAN_DEST}" proto ah \
comment "${VLAN_FW_COMMENTS}"
Controlling Keepalived daemon command
Use the sysctl command:
sudo systemctl start keepalived.service

sudo systemctl stop keepalived.service
Run the following command on both redis1 and redis2 hosts:
sudo systemctl restart keepalived.service

sudo systemctl status keepalived.service
 ●  keepalived.service - Keepalive Daemon (LVS and VRRP)
     Loaded: loaded (/lib/systemd/system/keepalived.service; enabled; vendor preset: enabled)
     Active:  active (running) since Sat 2021-08-07 18:40:48 UTC; 39s ago
   Main PID: 33940 (keepalived)
      Tasks: 2 (limit: 4617)
     Memory: 2.2M
     CGroup: /system.slice/keepalived.service
             ├─33940 /usr/sbin/keepalived --dont-fork
             └─33951 /usr/sbin/keepalived --dont-fork

Aug 07 18:40:48 linode-nixcraft-01 Keepalived_vrrp[33951]: VRRP_Script(chk_haproxy) succeeded
Aug 07 18:40:48 linode-nixcraft-01 Keepalived_vrrp[33951]: (LB_VIP_1) Changing effective priority from 101 to 103
Aug 07 18:40:48 linode-nixcraft-01 Keepalived_vrrp[33951]: SMTP alert successfully sent.
Aug 07 18:40:49 linode-nixcraft-01 Keepalived_vrrp[33951]: (LB_VIP_1) received lower priority (102) advert from 172.0.0.3 - discarding
Aug 07 18:40:50 linode-nixcraft-01 Keepalived_vrrp[33951]: (LB_VIP_1) received lower priority (102) advert from 172.0.0.3 - discarding
Aug 07 18:40:51 linode-nixcraft-01 Keepalived_vrrp[33951]: (LB_VIP_1) received lower priority (102) advert from 172.0.0.3 - discarding
Aug 07 18:40:52 linode-nixcraft-01 Keepalived_vrrp[33951]: (LB_VIP_1) received lower priority (102) advert from 172.0.0.3 - discarding
Aug 07 18:40:52 linode-nixcraft-01 Keepalived_vrrp[33951]: (LB_VIP_1) Entering MASTER STATE
Aug 07 18:40:52 linode-nixcraft-01 Keepalived_vrrp[33951]: Remote SMTP server [127.0.0.1]:25 connected.
Aug 07 18:40:52 linode-nixcraft-01 Keepalived_vrrp[33951]: SMTP alert successfully sent.
You will also start getting an email notification about IP failover and who has VIP currently. For instance:
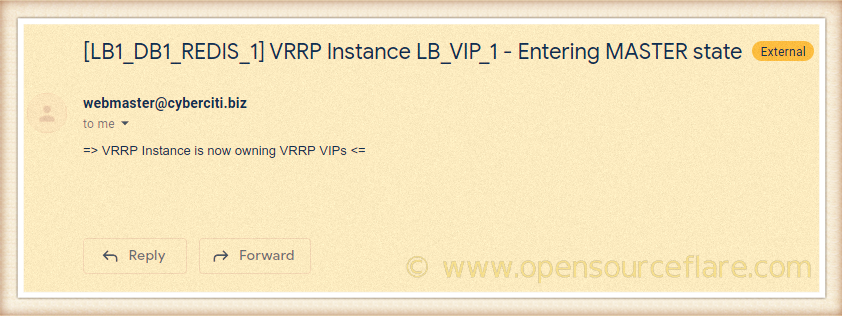
Email notification from Keepalived
Deliverable
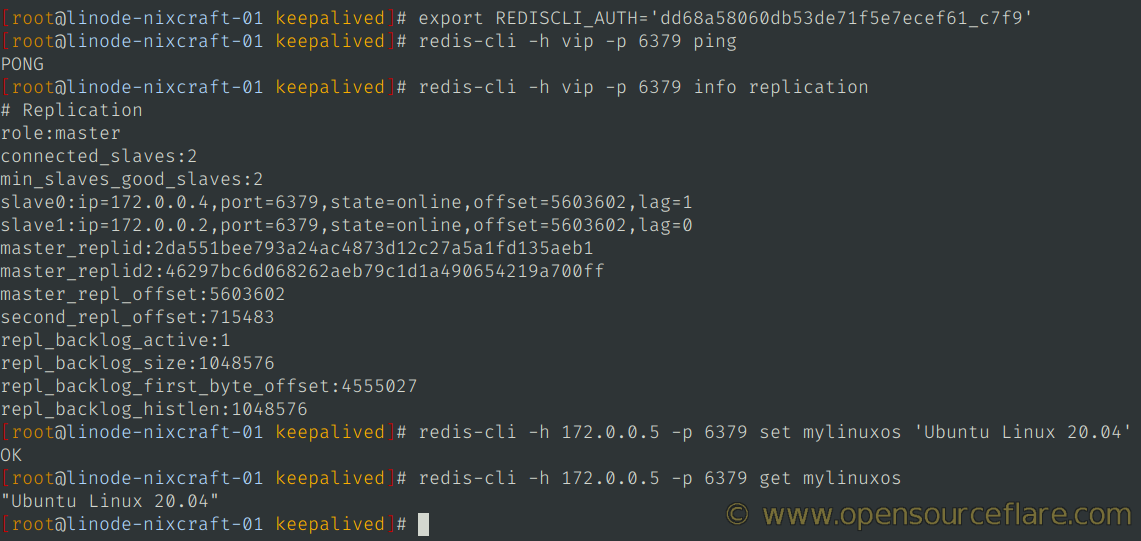
Our Redis cluster is up and running entirely and ready to use. Now all you have to do is point all clients to VIP 172.0.0.5 and TCP port 6379. But, first, let us see how to verify everything once again.
Connecting to our Redis cluster using VIP
Use the redis-cli as follows:
# note vip == 172.0.0.5 (HAProxy IP)
export REDISCLI_AUTH='dd68a58060db53de71f5e7ecef61_c7f9'
redis-cli -h vip -p 6379 ping
redis-cli -h vip -p 6379 info replication

# instead of vip we can use 172.0.0.5 and query will be redirected to healthy host
redis-cli -h 172.0.0.5 -p 6379 set mylinuxos 'Ubuntu Linux 20.04'
redis-cli -h 172.0.0.5 -p 6379 get mylinuxos
How to see HAProxy stats
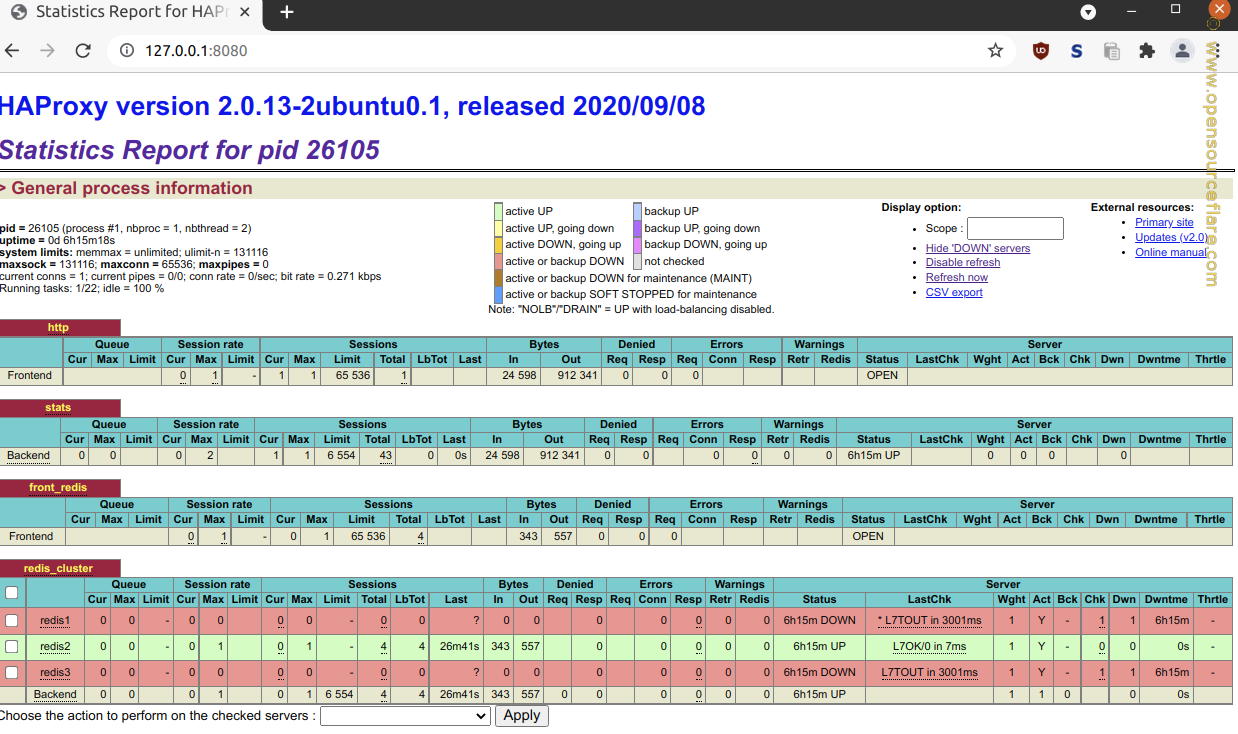
Login using the ssh command from your desktop:
sh -N -f -L 8080:localhost:8080 user@your-server-ip
Fire a web browser of your choice on your desktop and type:
http://127.0.0.1:8080
Statistics report for Redis cluster
We can further configure HAProxy to write Redis data to the healthy node but distribute all read queries to all available slave servers (read replica). This requires a two-port configuration, one for writing and the other for reading queries including app modification.
List of services running on three node cluster
sudo ps aux \
| grep -E -i 'keepalived|redis|haproxy' \
| grep -v grep
redis      26054  0.4  0.1  52752  6152 ?        Ssl  13:06   1:29 /usr/bin/redis-server 172.0.0.2:6379
redis      26058  0.5  0.1  50192  4900 ?        Ssl  13:06   2:01 /usr/bin/redis-sentinel 172.0.0.2:26379 [sentinel]
root       26094  0.0  0.4  27104 17656 ?        Ss   13:10   0:01 /usr/sbin/haproxy -Ws -f /etc/haproxy/haproxy.cfg -p /run/haproxy.pid -S /run/haproxy-master.sock
haproxy    26105  0.0  0.3 101500 12512 ?        Sl   13:10   0:11 /usr/sbin/haproxy -Ws -f /etc/haproxy/haproxy.cfg -p /run/haproxy.pid -S /run/haproxy-master.sock
root       33940  0.0  0.1  25256  8044 ?        Ss   18:40   0:00 /usr/sbin/keepalived --dont-fork
root       33951  0.0  0.1  25636  5152 ?        S    18:40   0:00 /usr/sbin/keepalived --dont-fork
Network ports opened by our 3-node Redis cluster
sudo ss -tulpn | grep -E -i 'haproxy|redis-'
From both redis1 and redis2 hosts:
tcp     LISTEN   0        4096           172.0.0.5:6379           0.0.0.0:*      users:(("haproxy",pid=24554,fd=8))
tcp     LISTEN   0        511            172.0.0.3:26379          0.0.0.0:*      users:(("redis-sentinel",pid=23285,fd=6))
tcp     LISTEN   0        511            172.0.0.3:6379           0.0.0.0:*      users:(("redis-server",pid=23226,fd=6))
tcp     LISTEN   0        4096           127.0.0.1:8080           0.0.0.0:*      users:(("haproxy",pid=24554,fd=7))
From the redis3 host:
tcp     LISTEN   0        511            172.0.0.4:26379          0.0.0.0:*      users:(("redis-sentinel",pid=22529,fd=6))
tcp     LISTEN   0        511            172.0.0.4:6379           0.0.0.0:*      users:(("redis-server",pid=22518,fd=6))
Firewall rules listing for three node cluser
By default, ufw denies all incoming connections on all interfaces. Therefore, we need to open the required TCP or UDP ports. The sample set up only opened TCP/22 (SSH) port for VPN admin users and VLAN users.
sudo ufw status # <--- redis1 host
Outputs:
Status: active

To                         Action      From
--                         ------      ----
22/tcp                     ALLOW       139.xxx.yy.zz              # Open TCP SSH PORT for OFFICE_VPN
172.0.0.2 6379/tcp on eth1 ALLOW       172.0.0.0/24               # Open TCP Redis PORT on redis1 host for cluster
172.0.0.2 26379/tcp on eth1 ALLOW       172.0.0.0/24               # Open TCP SENTIEL PORT on redis1 host for cluster
172.0.0.5 6379/tcp on eth1 ALLOW       172.0.0.0/24               # VLAN_CIDR->HAPROXY->VIP->Redis cluster
224.0.0.18/ah on eth1      ALLOW       172.0.0.3/ah               # VLAN: keepalived multicast
sudo ufw status # <--- redis2 host
Outputs:
Status: active

To                         Action      From
--                         ------      ----
22/tcp                     ALLOW       139.xxx.yy.zz              # Open TCP SSH PORT for OFFICE_VPN
172.0.0.3 6379/tcp on eth1 ALLOW       172.0.0.0/24               # Open TCP Redis PORT on redis2 host for cluster
172.0.0.3 26379/tcp on eth1 ALLOW       172.0.0.0/24               # Open TCP SENTIEL PORT on redis2 host for cluster
172.0.0.3 22/tcp on eth1   ALLOW       172.0.0.0/24               # Open TCP SSH PORT for linode-nixcraft-01
172.0.0.5 6379/tcp on eth1 ALLOW       172.0.0.0/24               # VLAN_CIDR->HAPROXY->VIP->Redis cluster
224.0.0.18/ah on eth1      ALLOW       172.0.0.2/ah               # VLAN: keepalived multicast
sudo ufw status # <--- redis3 host
Since HAProxy only running on redis1 and redis2 hosts, those ports are not opened on the redis3 host:
Status: active

To                         Action      From
--                         ------      ----
22/tcp                     ALLOW       139.xxx.yy.zz              # Open TCP SSH PORT for OFFICE_VPN
172.0.0.4 6379/tcp on eth1 ALLOW       172.0.0.0/24               # Open TCP Redis PORT on redis3 host for cluster
172.0.0.4 26379/tcp on eth1 ALLOW       172.0.0.0/24               # Open TCP SENTIEL PORT on redis3 host for cluster
Summing up
I know the whole guide is pretty long and may look complicated to new developers and sysadmins. But, it does cover everything that needs to build a complete working cluster:
- A 3-node Redis cluster (always have an odd number of nodes in the cluster such as 5, 7, and so on)
- HAproxy and Keepalived for traffic redirection and cluster IP failover
- Firewall and password security for Redis cluster
- VLAN (or VPC) is used for entire clusters to keep your traffic safe. If you don’t have VLAN or VPC, consider setting up mesh networking using tinc or something like WireGuard.
- Email-based alert for IP failover and HAProxy when Redis node goes up and down.
- HAProxy web-based statistics
Make sure you check project documentation:
Now you know how to set up everything manually. The next logical step is to automate the Redis cluster building using Ansible or shell/Perl scripts. And, yes, you can use LXD or Docker, which requires NAT support. Let me know your thoughts in the comments section below.
HAPorxy ???